Start here
Getting Started with Gentility
Gentility is the AI control plane for your organization. It governs how AI models access your databases, servers, and internal tools with filtering, audit logging, and policy controls.
This guide walks you through every step: creating your organization, installing the server agent, connecting a database, and hooking up your preferred MCP client (Claude, ChatGPT, or Claude Code).
1) Create your organization
Sign up or log in to the Gentility Console and create an organization.
Open ConsolePick your setup flow
Decide which resources you're exposing. The links jump to the relevant sections below.
Server-only shell access
Install the Gentility agent and stop there. Perfect for ephemeral shells or file operations.
Go to agent installDatabase target via direct IP
Connect a database reachable from Gentility over the public internet or VPN. No agent required.
Add DB (direct)Database routed through your server
Install the agent, create a portal, and expose internal databases through it.
Start with agent installInstall the Agent
Our open-source server agent securely bridges shells and databases to your LLM provider of choice, with filtering and logging. Supports Ubuntu, Debian and MacOS (more to come!).
Prerequisites
- Linux AMD64 (x86_64) system
- Ubuntu 20.04+, Debian 11+, or CentOS 8+
sudo,curlinstalled- ChatGPT Plus or Claude Pro (for MCP client features)
Before you install
Create a portal in the Gentility Console so the agent has a network anchor to register against. Each portal generates an access token you'll paste into the installer.
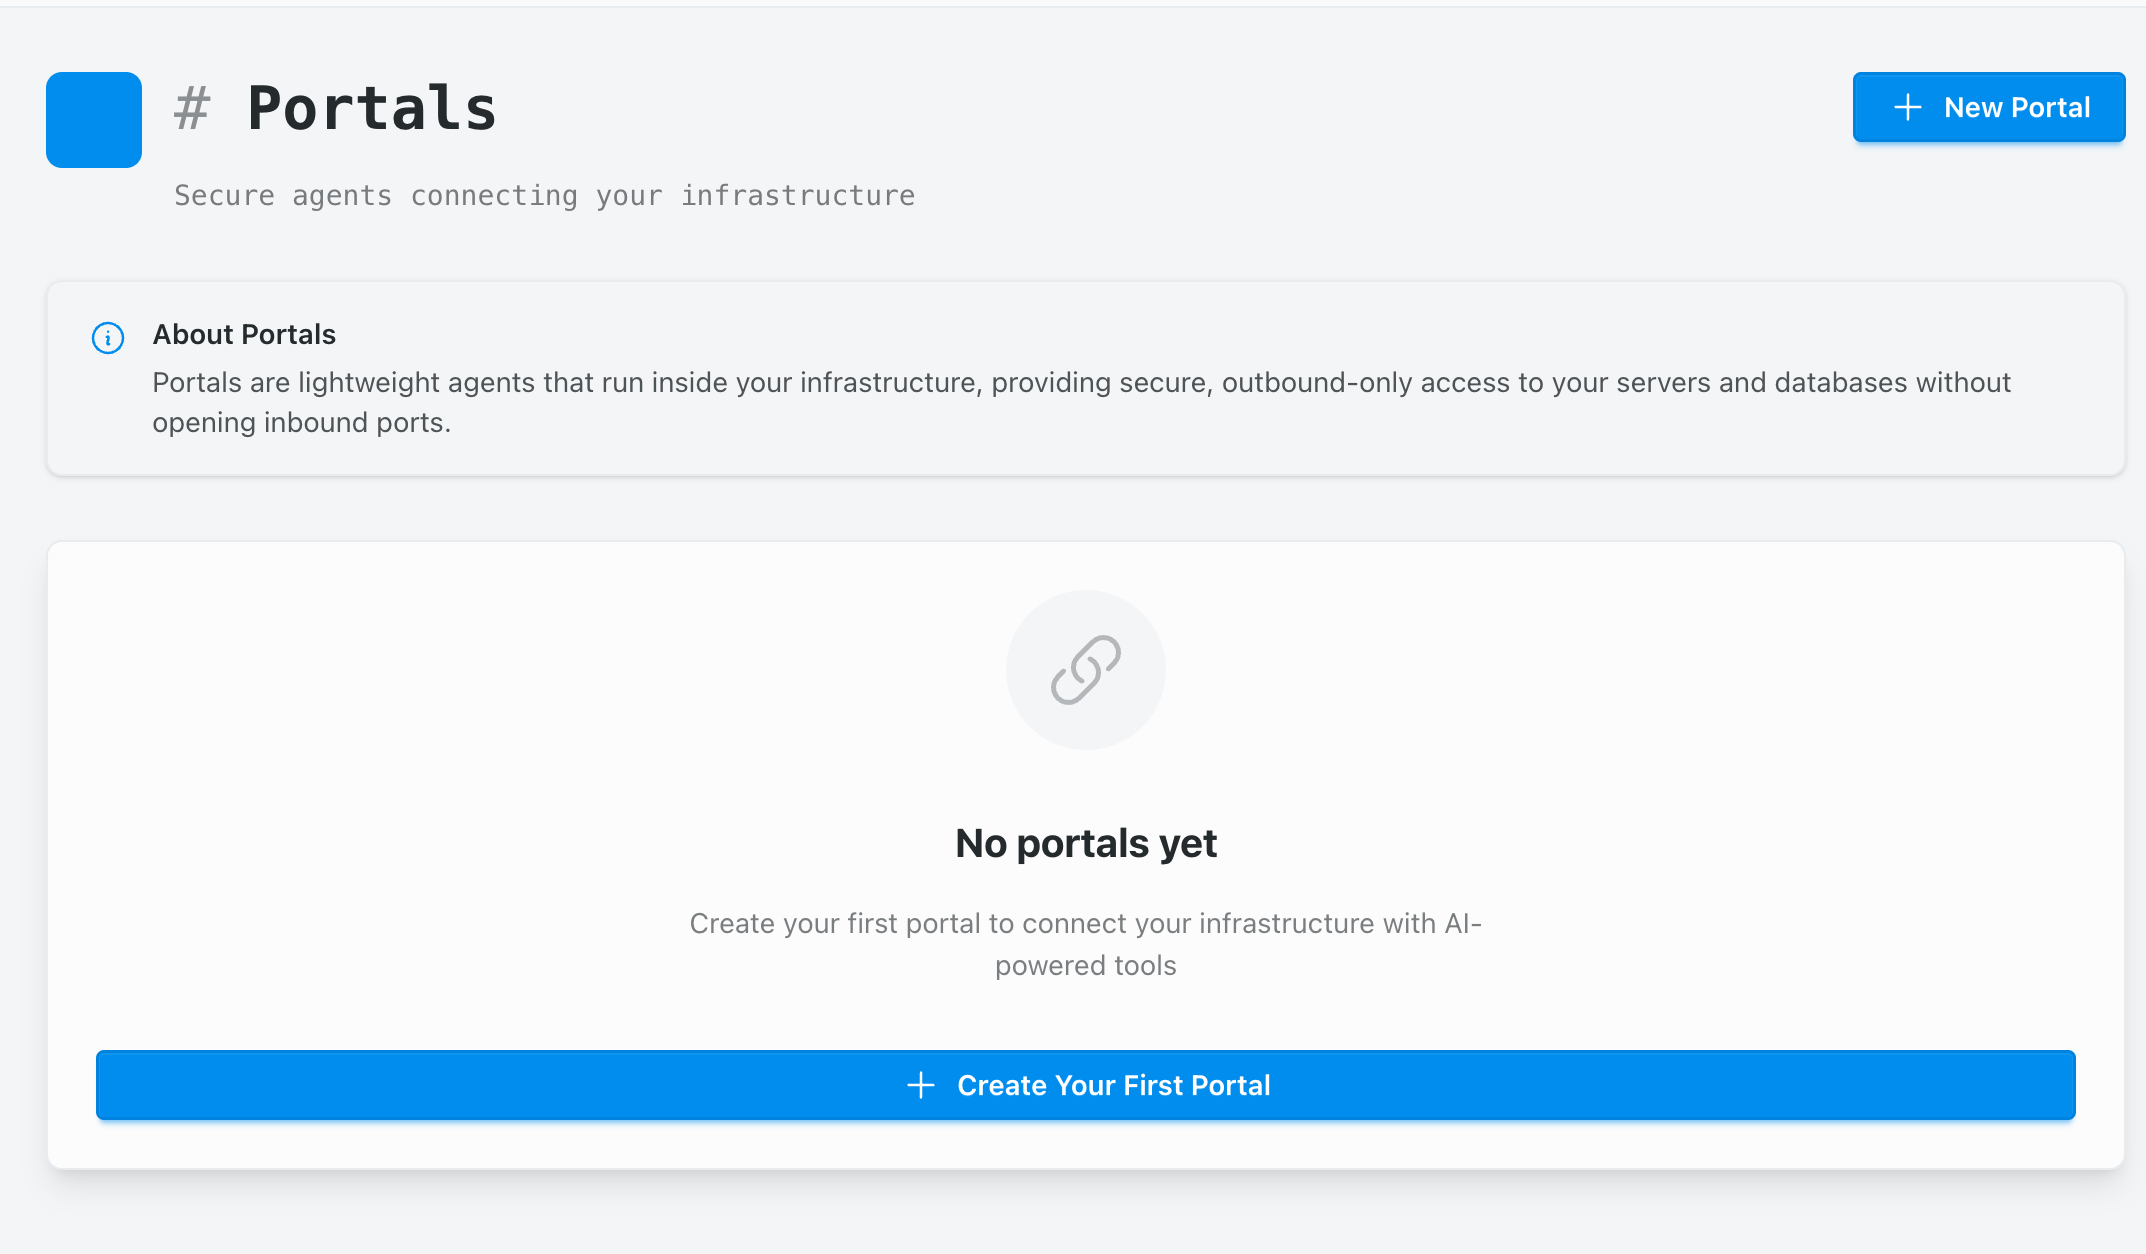
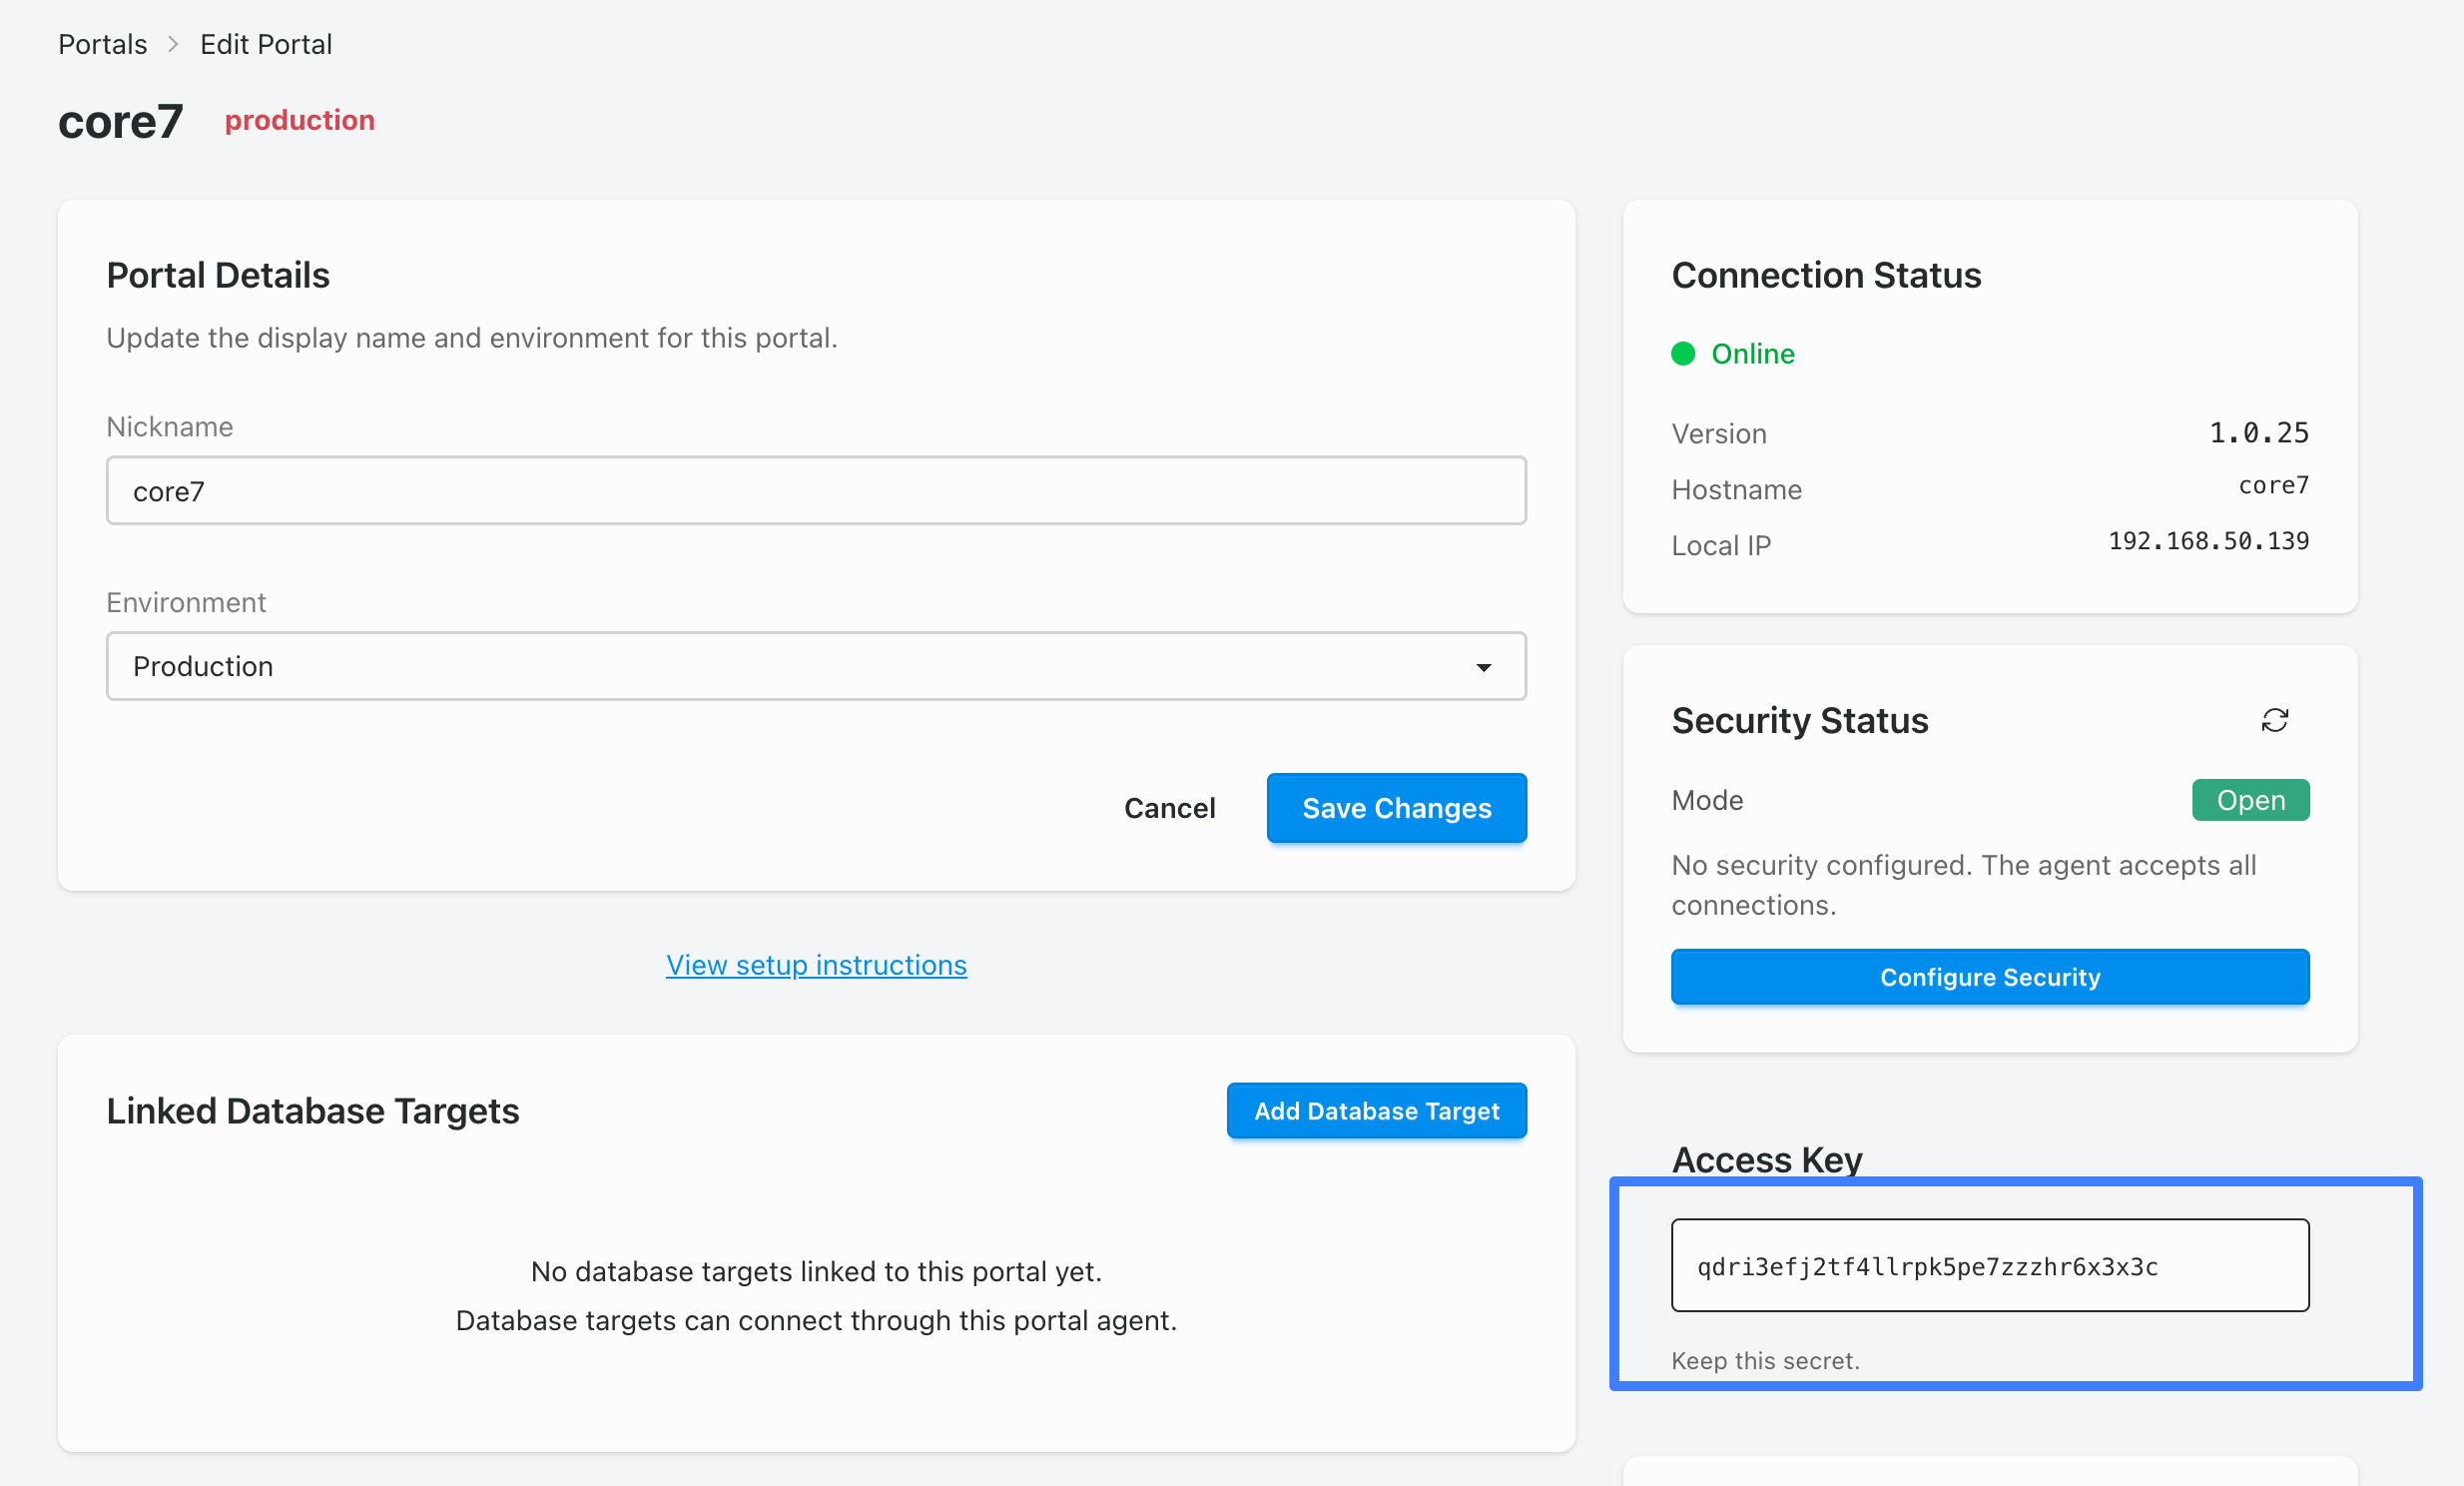
GENTILITY_PORTAL_TOKEN.
Option 1: APT Repository (Recommended)
# Add GPG key
sudo mkdir -p /etc/apt/keyrings
curl -s https://packages.gentility.ai/gentility-packages.gpg  | sudo tee /etc/apt/keyrings/gentility-packages.asc > /dev/null

# Add repository
echo "deb [signed-by=/etc/apt/keyrings/gentility-packages.asc] https://packages.gentility.ai/debian/ stable main" | sudo tee /etc/apt/sources.list.d/gentility.list

# Install agent
sudo apt update
sudo apt install gentility-agent
Option 2: Direct DEB Package
# Download latest package
wget https://github.com/gentility-ai/agent/releases/download/v1.0.32/gentility-agent_1.0.32_amd64.deb


# Install package
sudo dpkg -i gentility-agent_1.0.32_amd64.deb
sudo apt-get install -f
Setup & Configuration
# Initial setup (requires access token)
sudo gentility setup YOUR_TOKEN_HERE

# Start the agent
gentility runConnect a Database
Targets expose databases to your agent with policy controls. We recommend starting read-only while you confirm auditing and tooling. This guide uses our demo credentials, but the same flow applies to your own hosts.
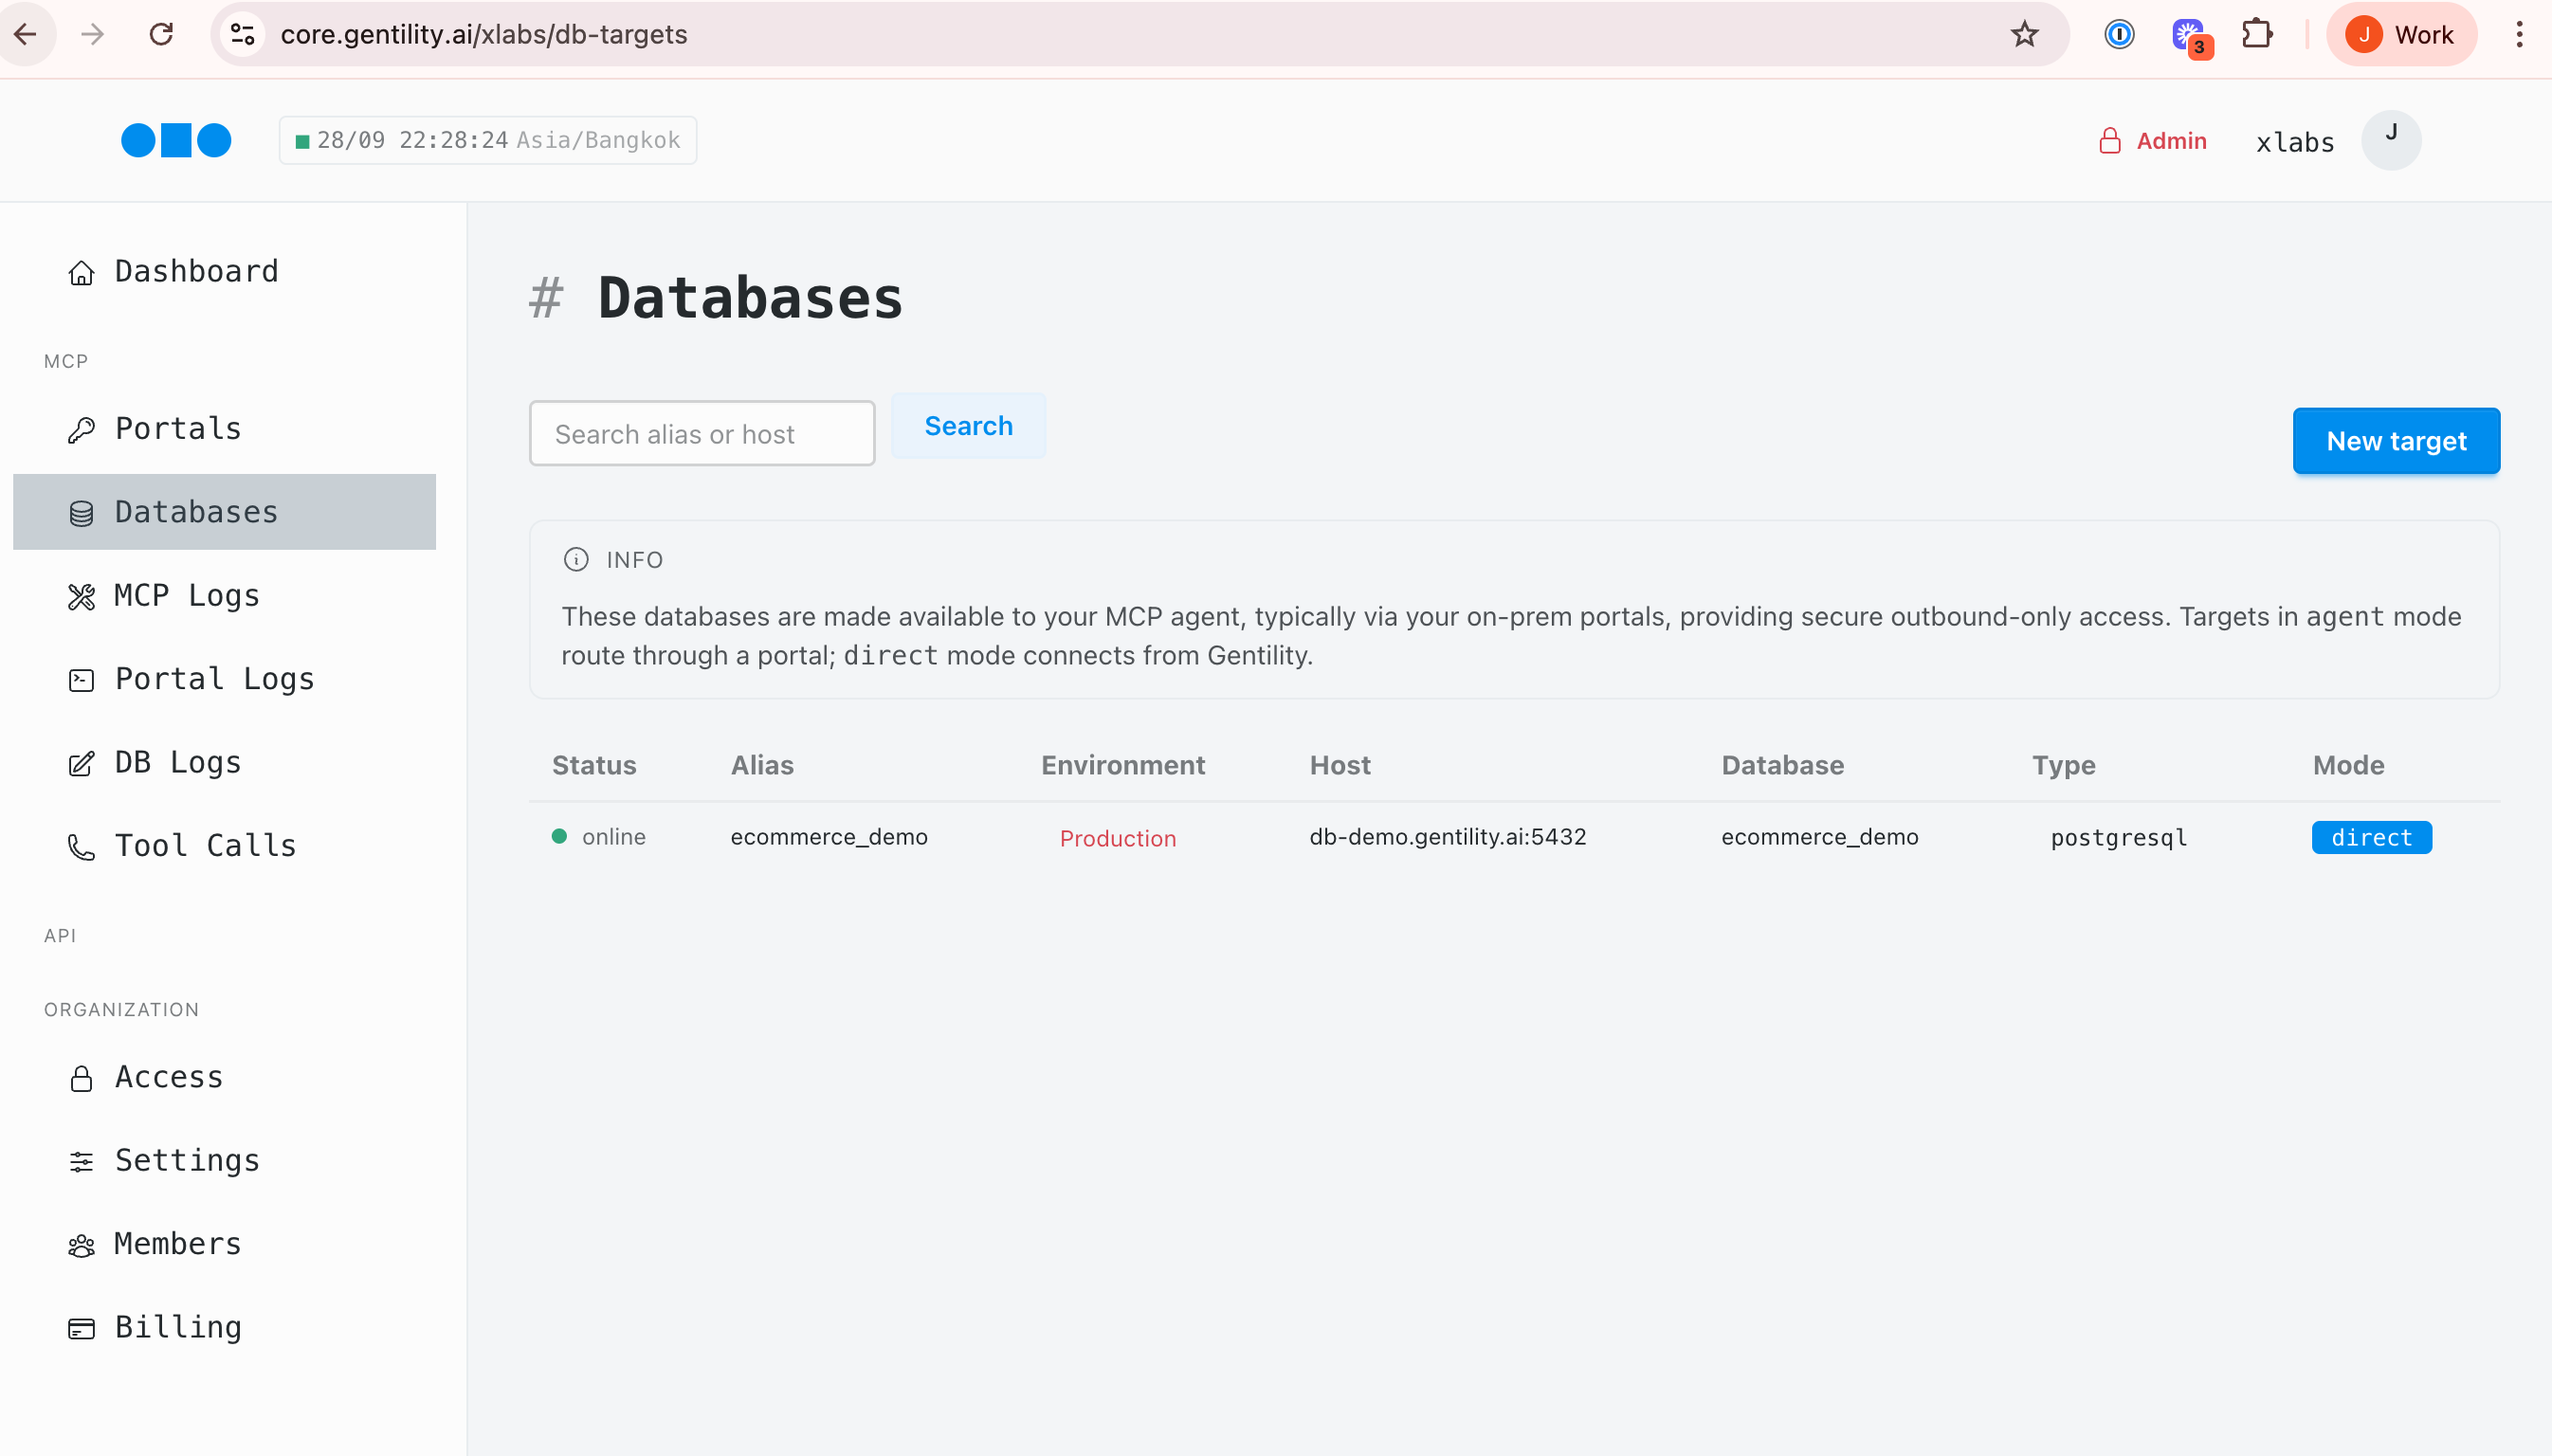
1) Open Databases in Console
In Console, navigate to Databases and click New target. You'll see existing connections and their status.
2) Paste the connection URL
Choose your database type then paste the connection string. Gentility parses the URL and pre-fills host, port, user, and database fields.
Try a demo database (read-only)
postgresql://readonly:readonly_pass_123@db-demo.gentility.ai:5432/ecommerce_demo mssql://readonly:readonly_pass_123@db-demo.gentility.ai:1433/ecommerce_demo 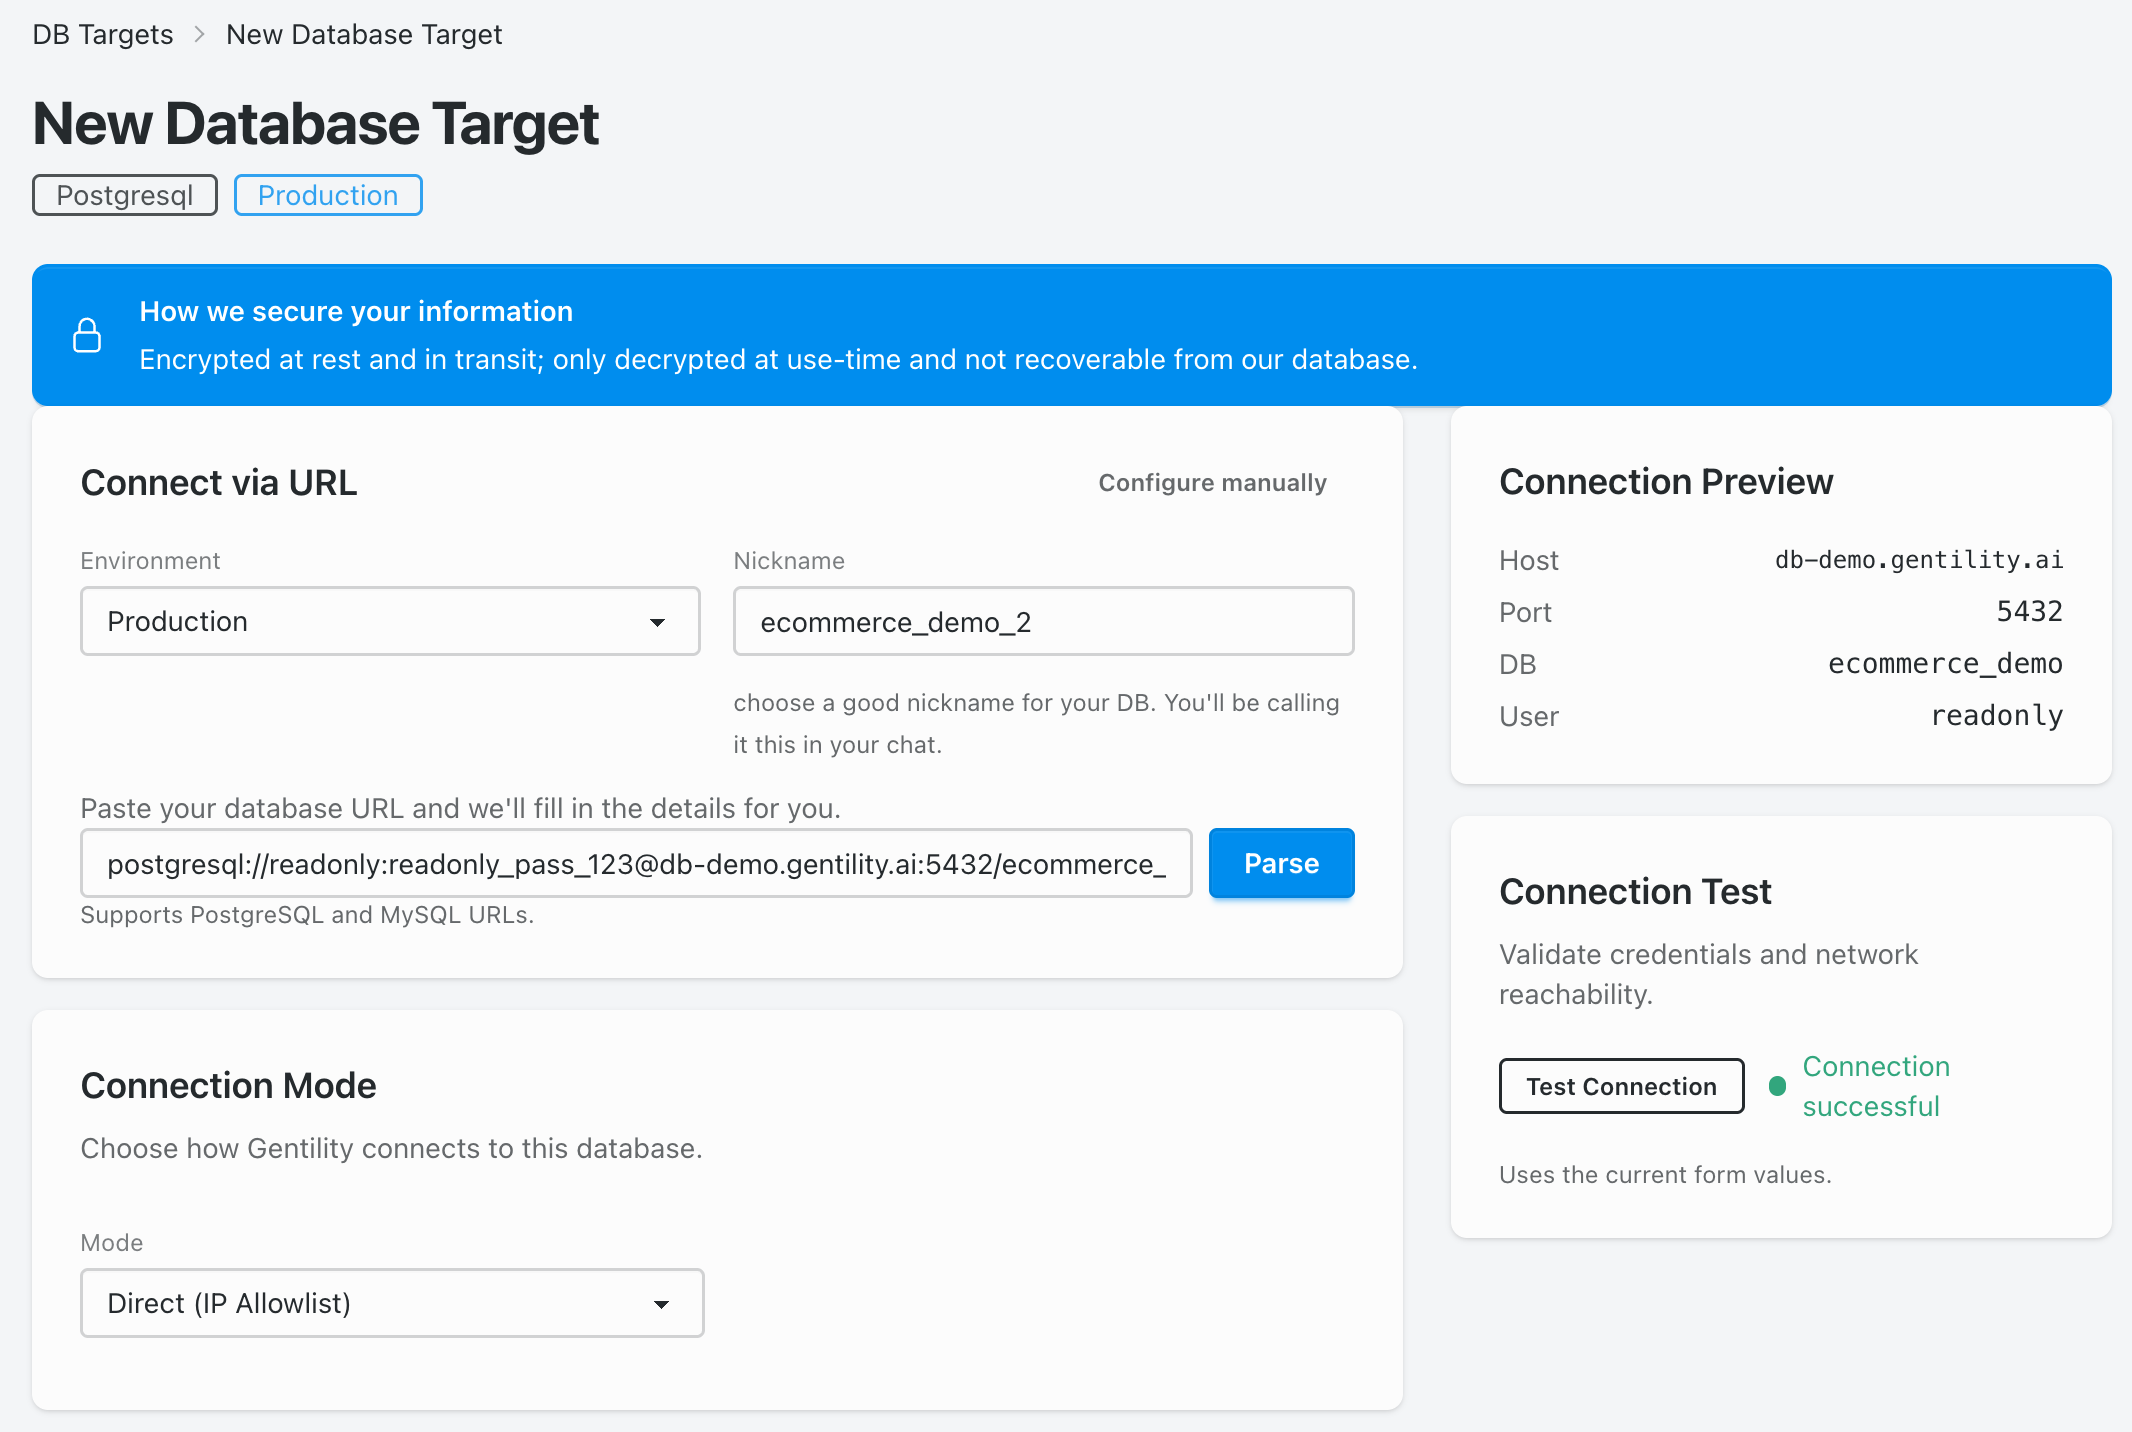
3) Configure access mode
Start with Direct (IP Allowlist) or your Gentility portal depending on network placement. Keep Read-only enabled for initial testing.
- Read-only: safest default, blocks mutating SQL by policy.
- Guarded writes: allow specific whitelisted commands or stored procedures after review.
- Full writes: only after you trust policy coverage and observability.
4) Test and save
Click Test connection. When the green success badge appears, save the target. The database is now exposed to Gentility tools with your chosen policies.

Alternative: Add a database via your agent
When a database is only reachable from inside your network, use the portal created during the agent install. Pick Agent (Portal) as the connection mode and supply the internal host/port.
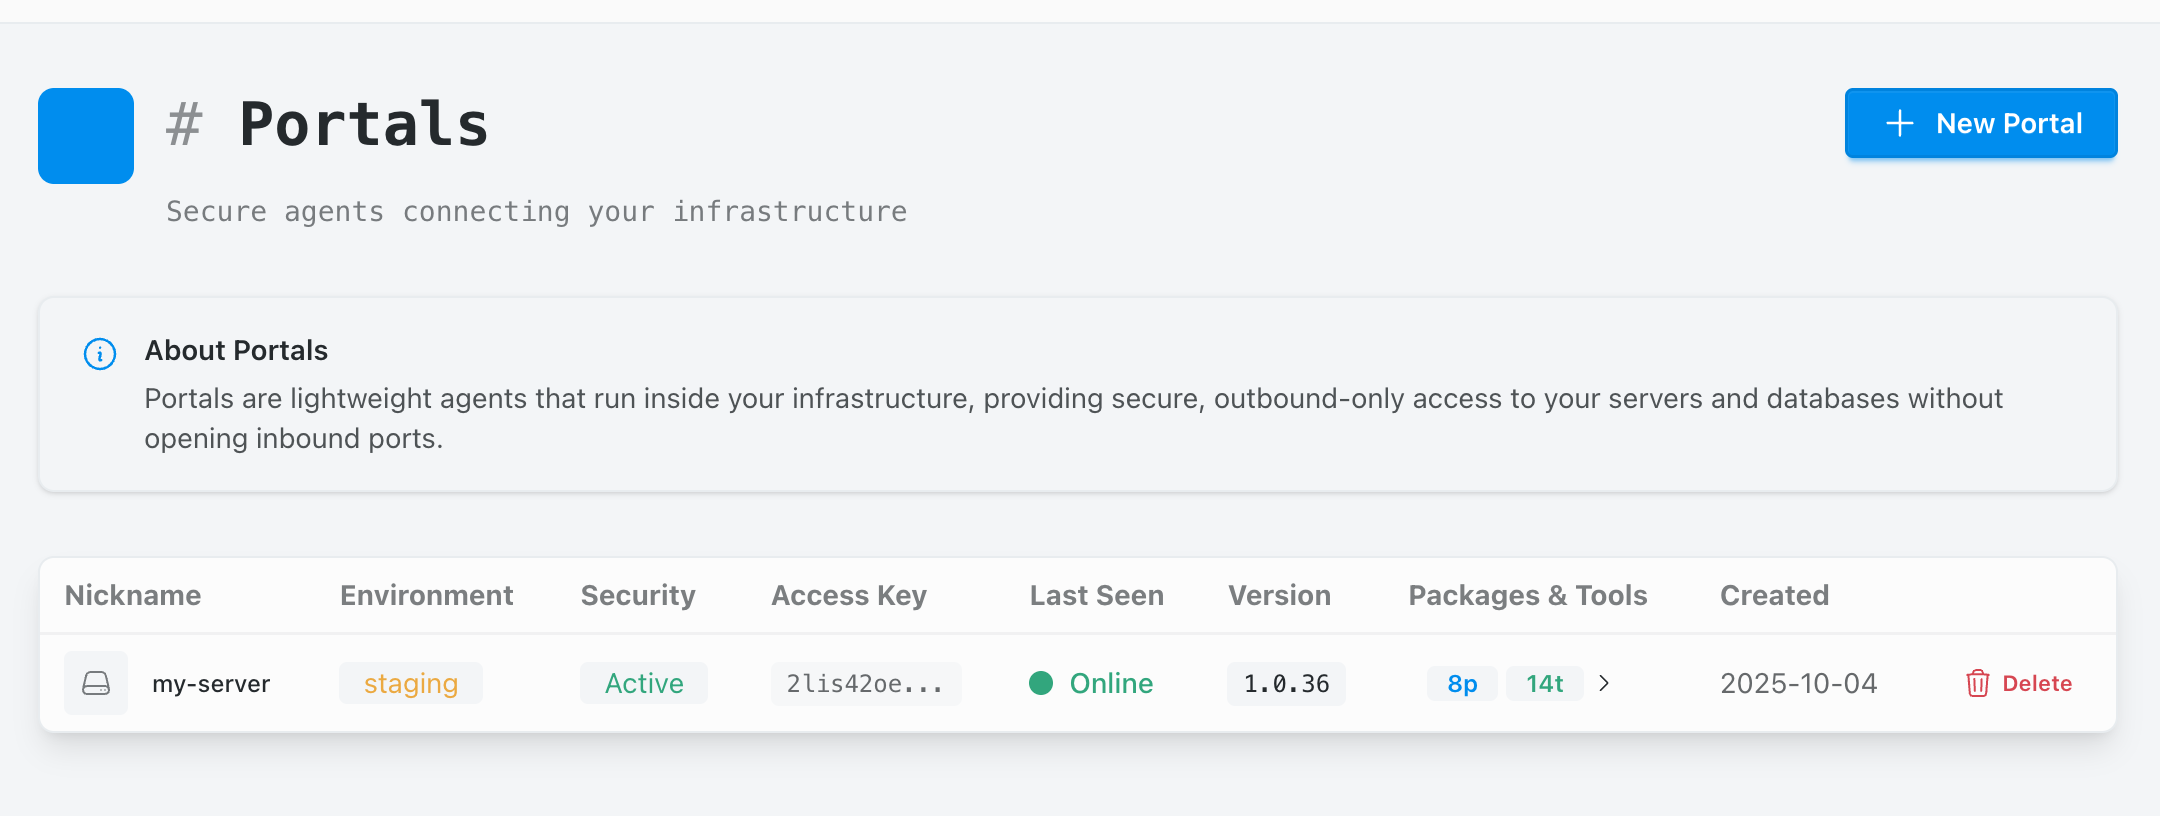
- Confirm the agent is online under Portals and note the portal name.
- In the new DB target form, choose the portal under Connection Mode → Agent and keep read-only enabled for testing.
- Test the connection. The agent proxies traffic through your portal; success indicates the internal host is reachable.
5) Verify safety and audit trails
Run a safe query and confirm the policy decision, logs, and any artifacts are recorded. Try a blocked write to see the denial response and audit entry.
# Example blocked command
rm -rf /   # → Denied by policy

# Example blocked SQL
DROP TABLE users; # → Denied by policyClaude Integration
Configure Claude to connect to your Gentility agent via MCP.
Important: The correct MCP URL is https://mcp.gentility.ai/.
Some screenshots may show an older URL — always use the URL provided in the instructions.
Requirements
- Claude client with MCP support (Claude Pro required)
- A running Gentility agent or DB
- Organization membership with MCP access
1) Add Gentility as a Connector
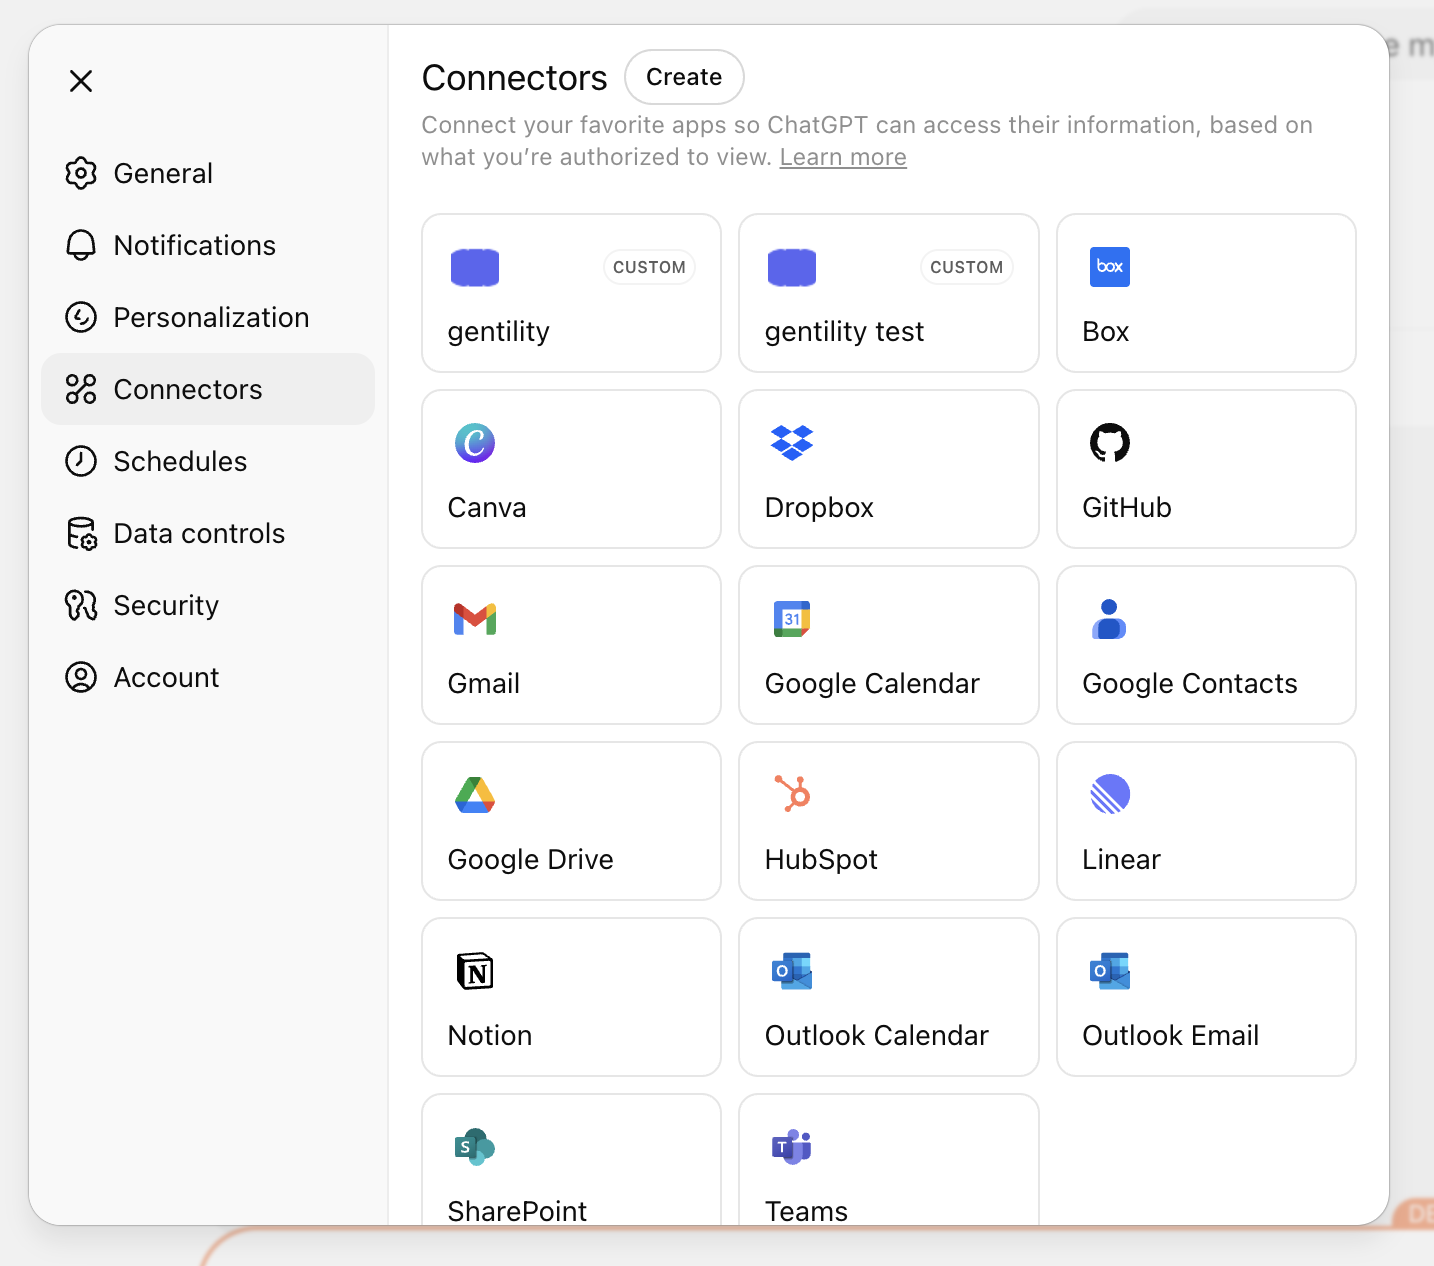
From Claude, open Settings → Connectors or use Manage connectors inside a chat. You'll see built-in services plus any custom entries you've created.
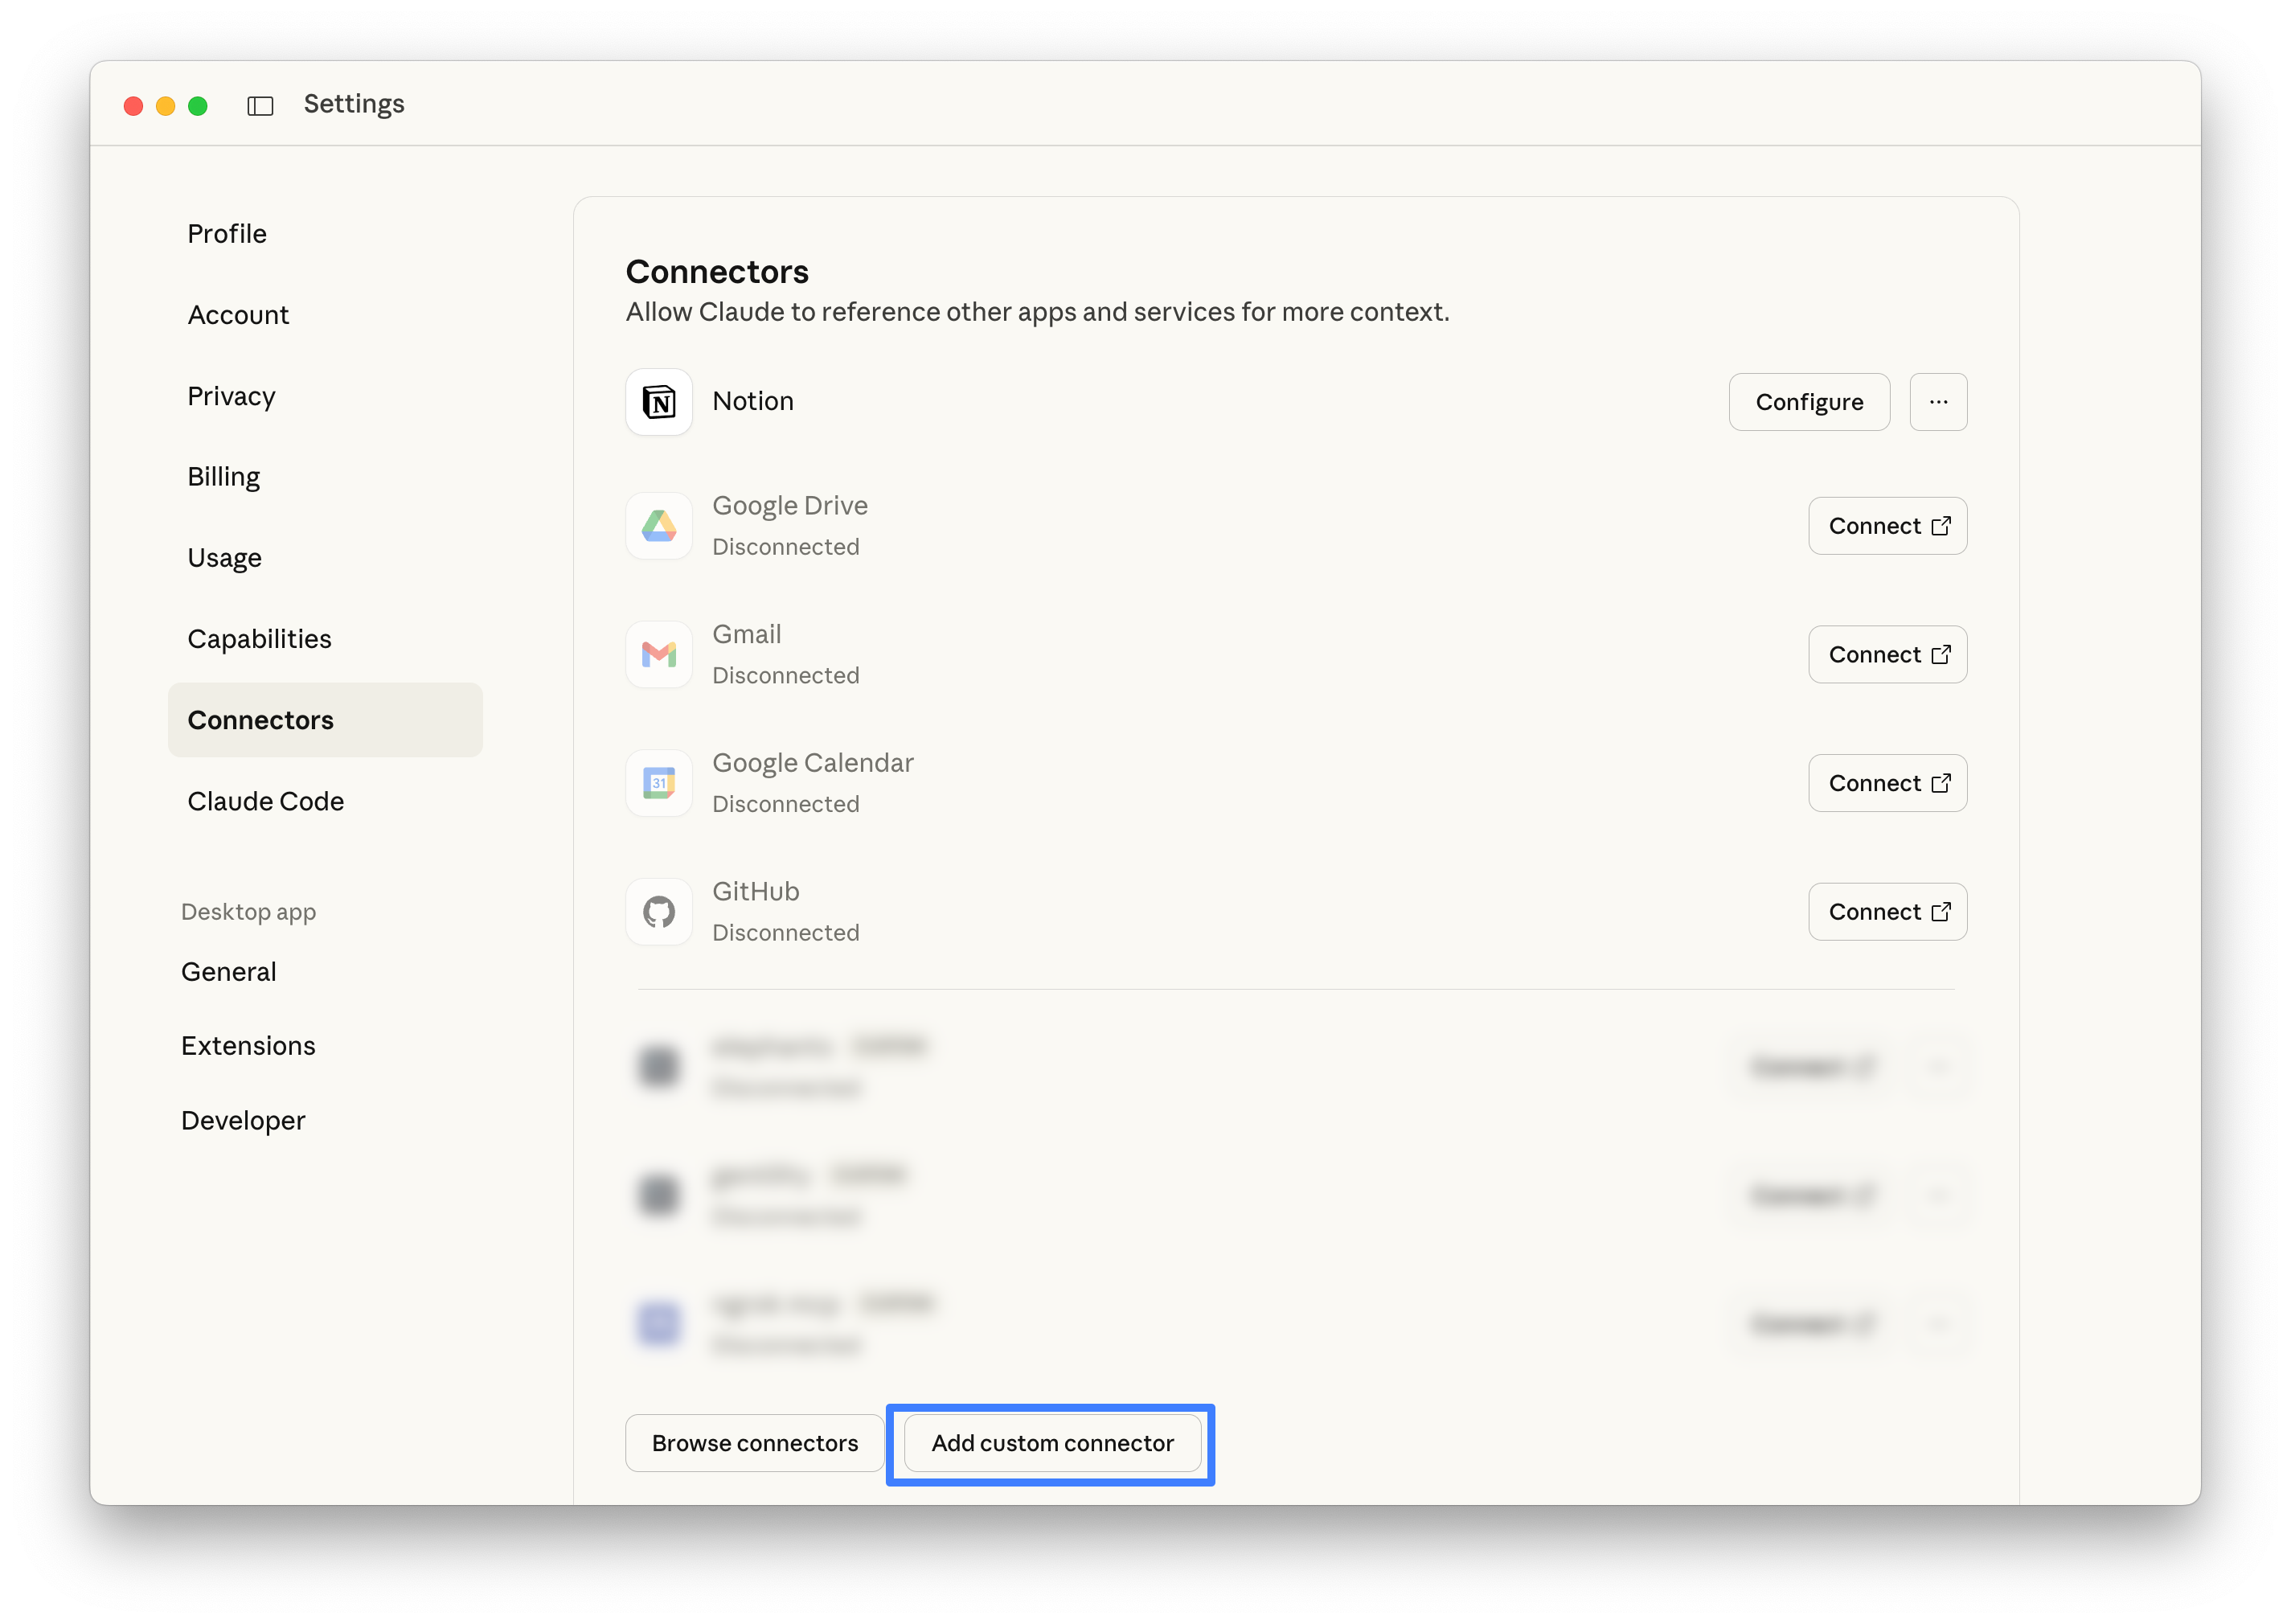
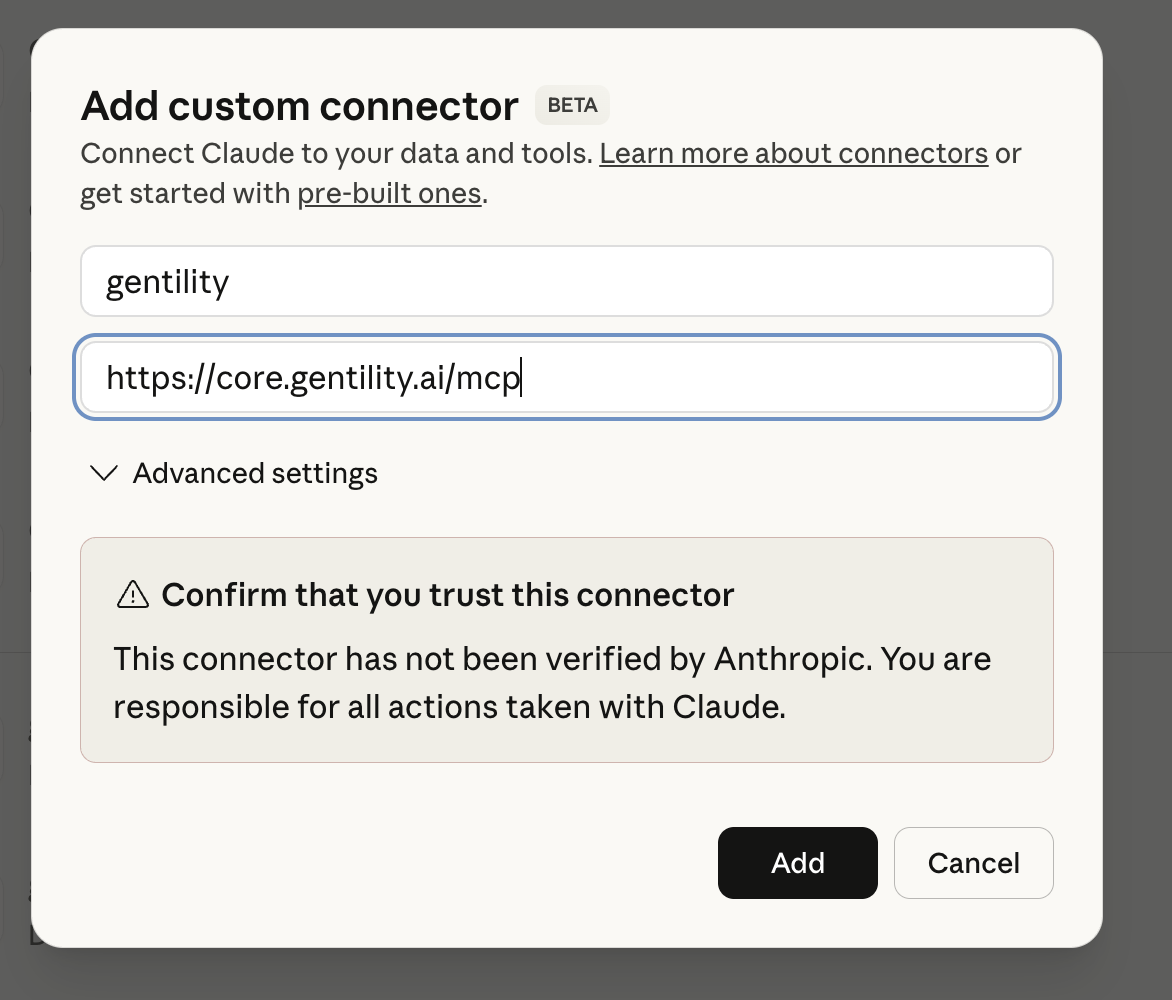
https://mcp.gentility.ai/, then confirm you trust the connector.
2) Connect
Click connect — you'll be redirected to Gentility to authorize Claude.

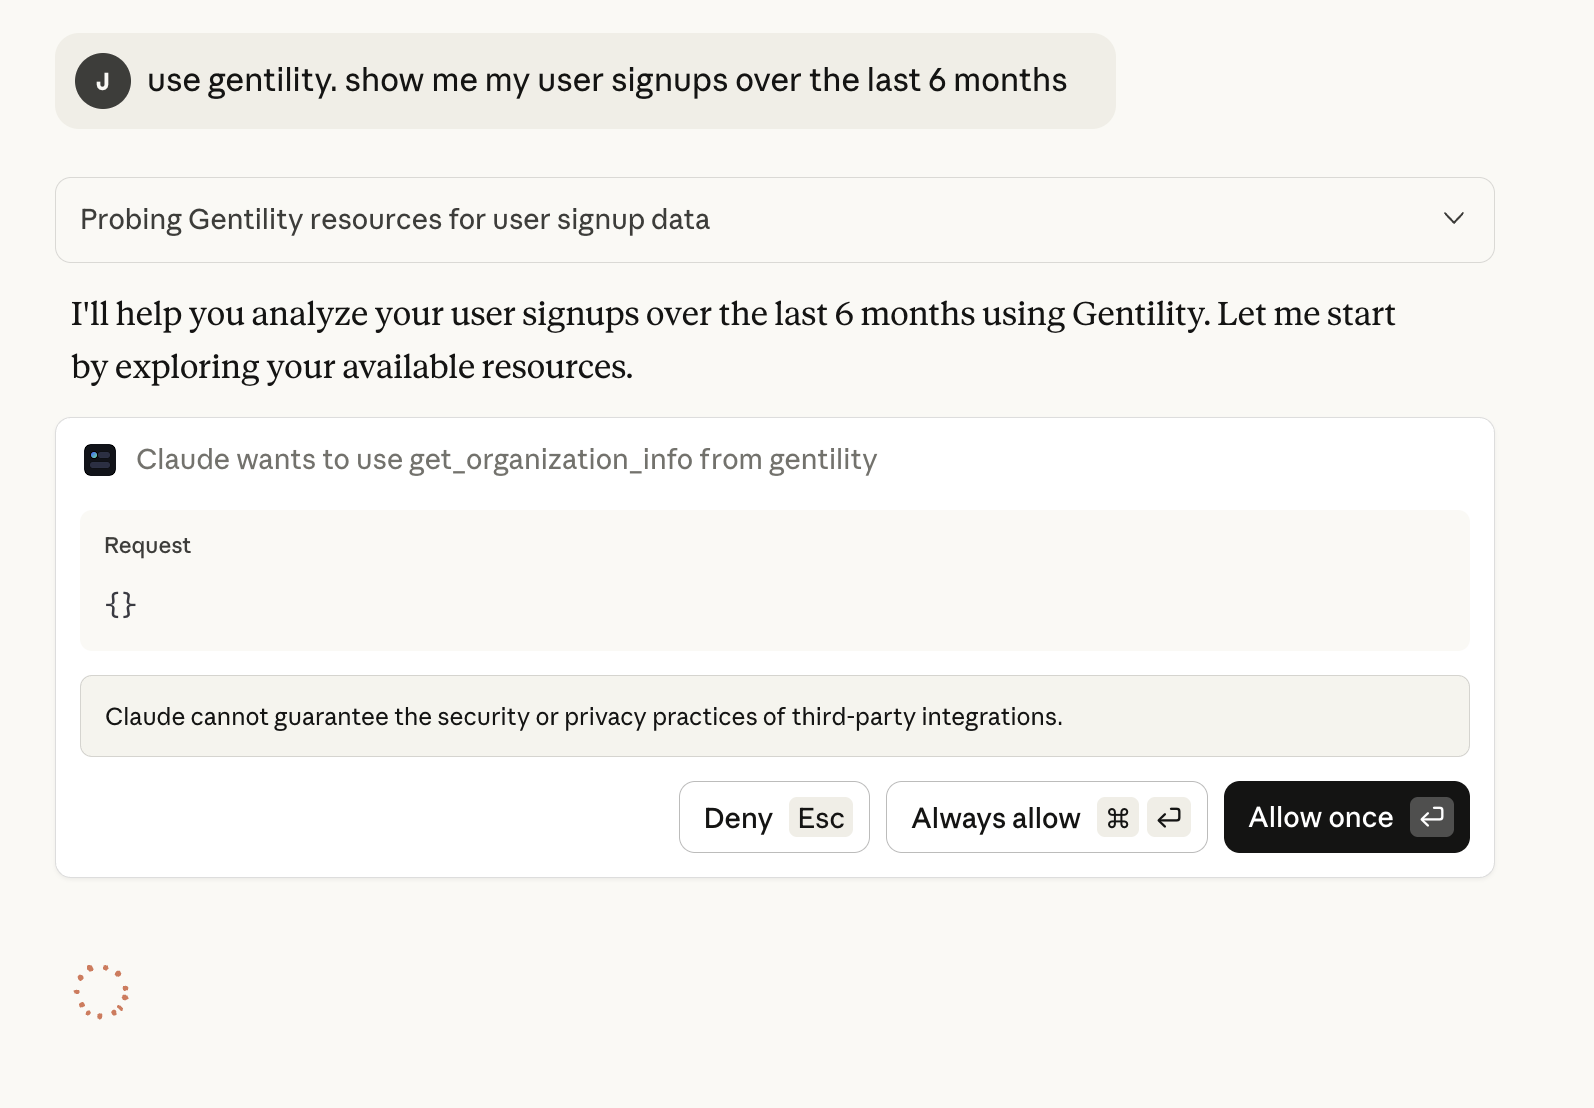
3) Run your first query
Now just ask for what you want! Talk naturally and Claude will use Gentility tools to access your resources.
ChatGPT Integration
Connect ChatGPT to your Gentility agent via the experimental MCP client.
Important: The correct MCP URL is https://mcp.gentility.ai/.
Some screenshots may show an older URL — always use the URL provided in the instructions.
Requirements
- ChatGPT (Plus or Pro required)
- A configured database or portal in Gentility
- Gentility MCP access enabled
Experimental warning
ChatGPT's MCP support is a beta feature.
Review OpenAI's official connector documentation and our ChatGPT preview post for the latest caveats.
1) Add Gentility as a connector
Open Settings → Connectors and confirm the Gentility card exists. Create it if needed.
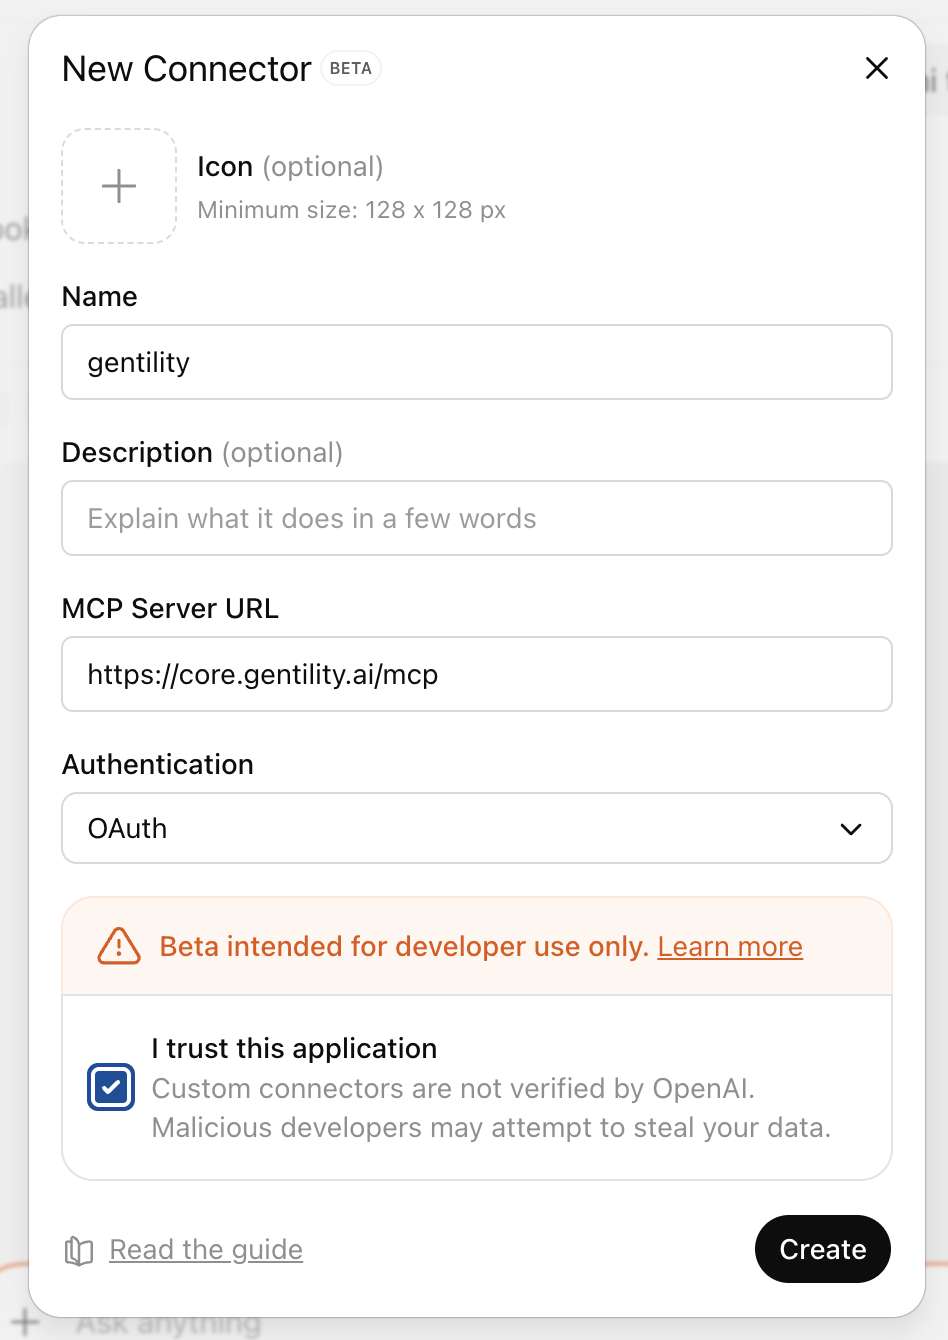
https://mcp.gentility.ai/. Trust the connector to proceed.
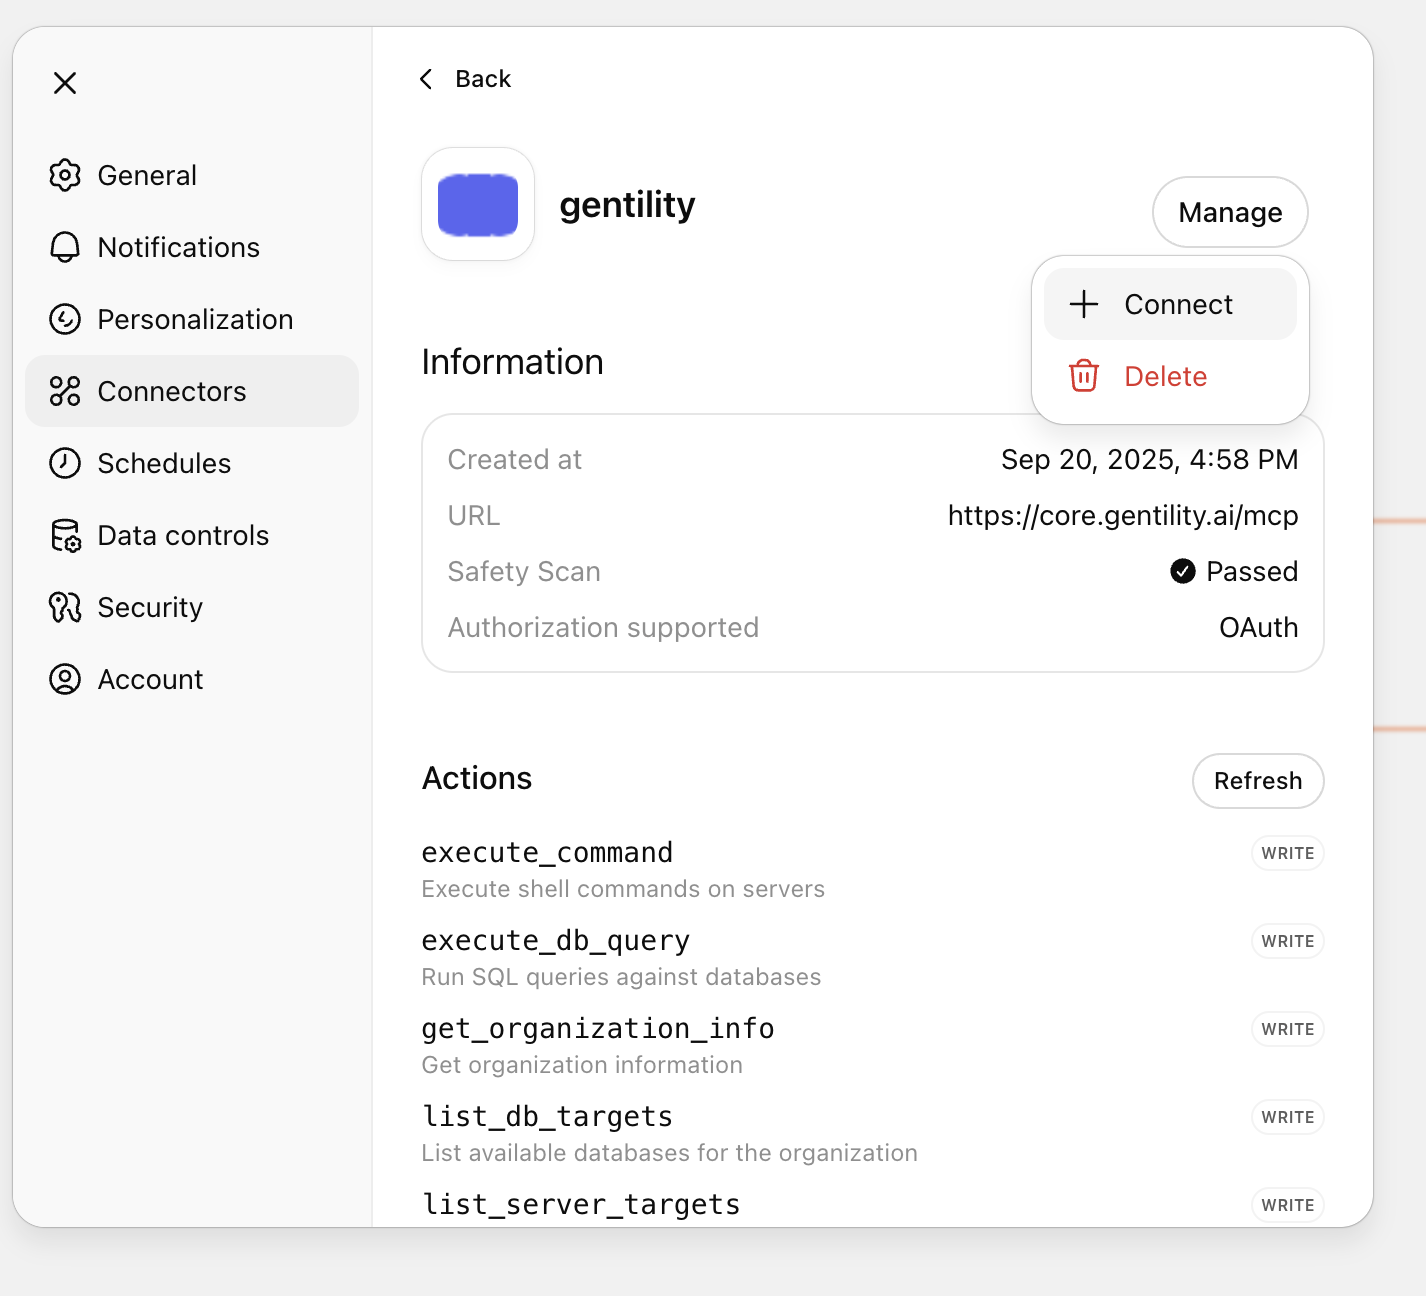
2) Connect and authorize
On the connector details page, choose Connect and finish the OAuth flow so Gentility can accept requests.
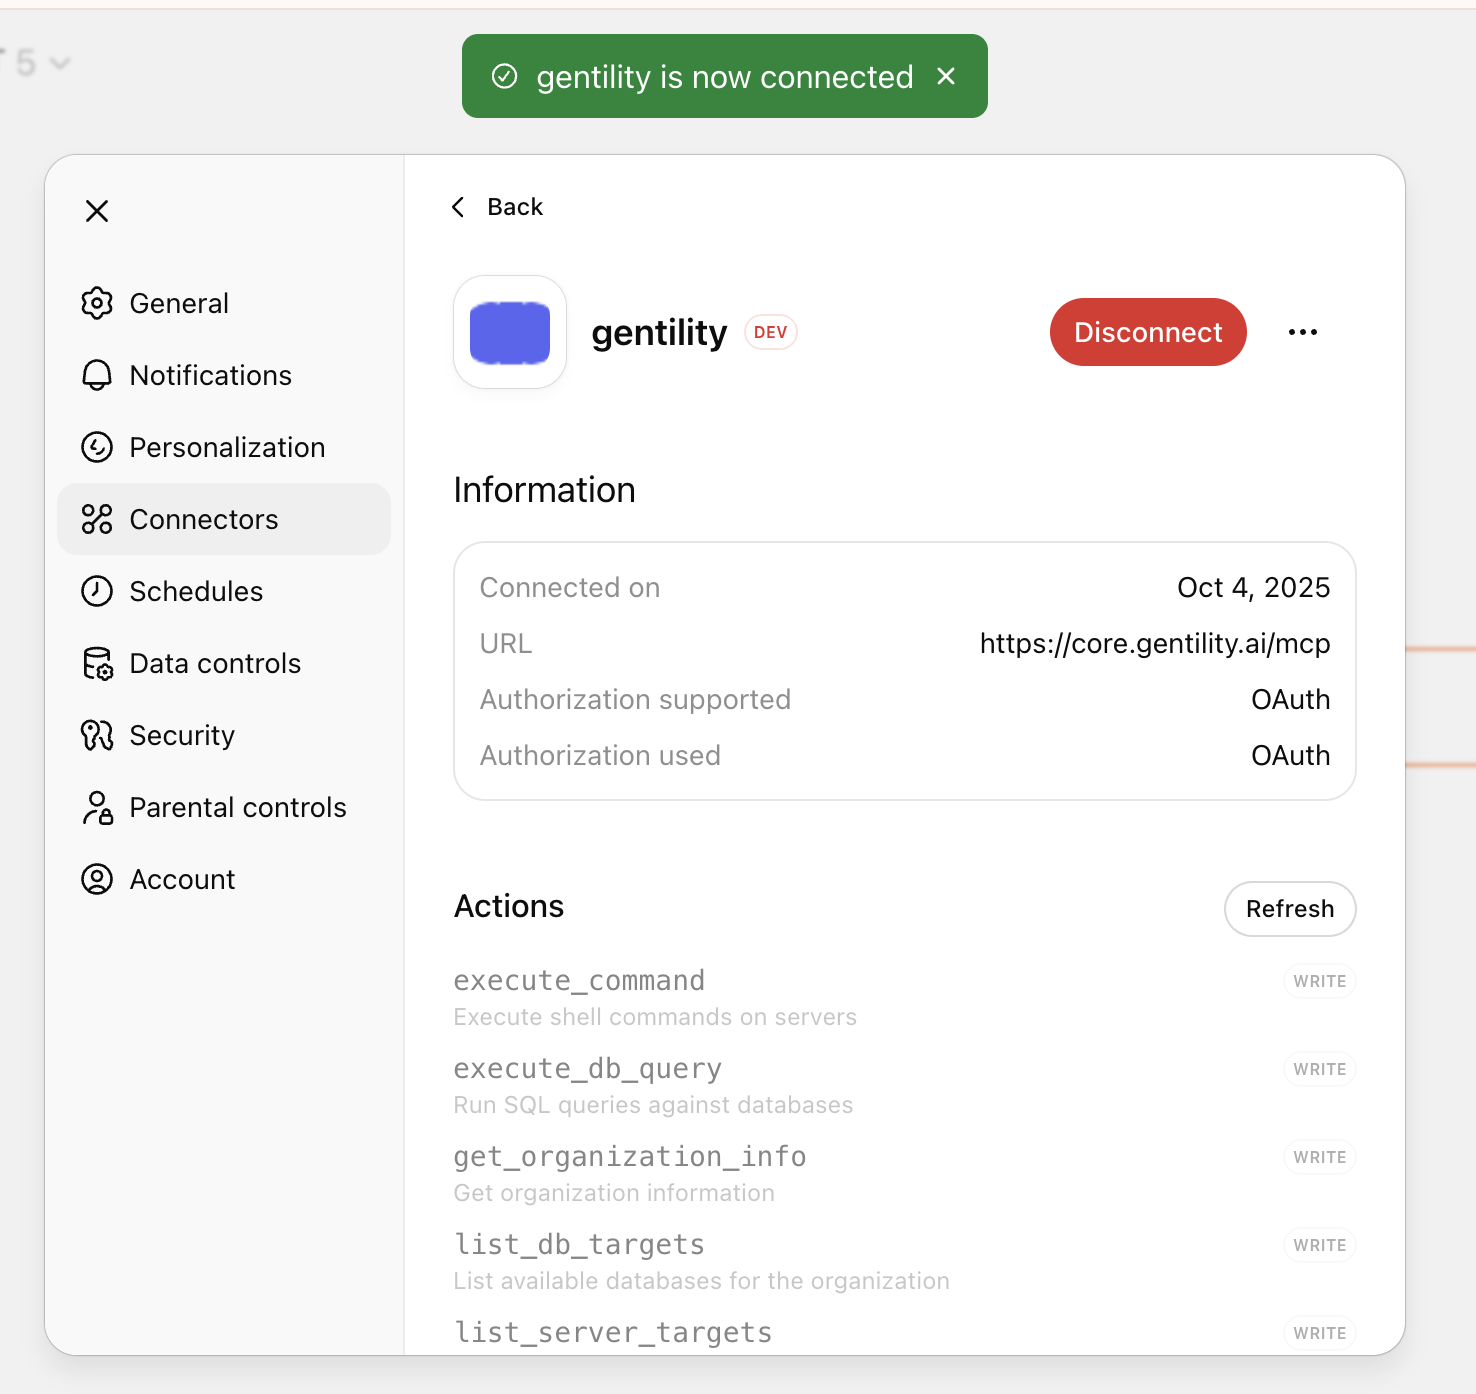
3) Use it!
Start a chat, enable the connector, and ask whatever you want.
Show me my databases in gentility Remember — ChatGPT support is still experimental. Please let us know about your experience: support@gentility.ai
Claude Code Integration
Configure Claude Code's MCP support to access your Gentility agent directly from the terminal.
Important: The correct MCP URL is https://mcp.gentility.ai/.
Some screenshots may show an older URL — always use the URL provided in the instructions.
Requirements
- Claude Code installed
- A running Gentility agent or DB
- Organization membership with MCP access
1) Add Gentility MCP Server
Use the claude mcp add command to configure the HTTP MCP server:
claude mcp add gentility --type http --url https://mcp.gentility.ai/ This will add Gentility to your MCP configuration. The resulting configuration will look like:
"gentility": {
  "type": "http",
  "url": "https://mcp.gentility.ai/"
}
2) Authenticate
When Claude Code connects to Gentility for the first time, you'll be prompted to authorize the connection through OAuth.
3) Start using Gentility
Once configured, Claude Code can access your Gentility tools and databases. Just ask naturally:
Show me my databases in Gentility